

This is a blog about simple coding techniques to use in your articles to help drive a wider audience to your website.
I’ve been using the following technique for the past 12 months. I actually came across this technique following a YouTube video posted by Canadian-born, Lilly Singh; who goes by the Twitter handle @iiSuperwomanii. She is a self-made blogger who has generated over 5 million subscribers. I have blogged about Singh here after watching one of her popular videos on Types of Teachers.
In this blog, I teach you how you can learn a fairly simple, yet sophisticated technique to drive more audience to each and every individual blogpost. This blog explains how it works and asks you, the reader to click and play around with the coding before walking you through the stages so that you can implement this for yourself.
If I can, then so can you …
Step 1:
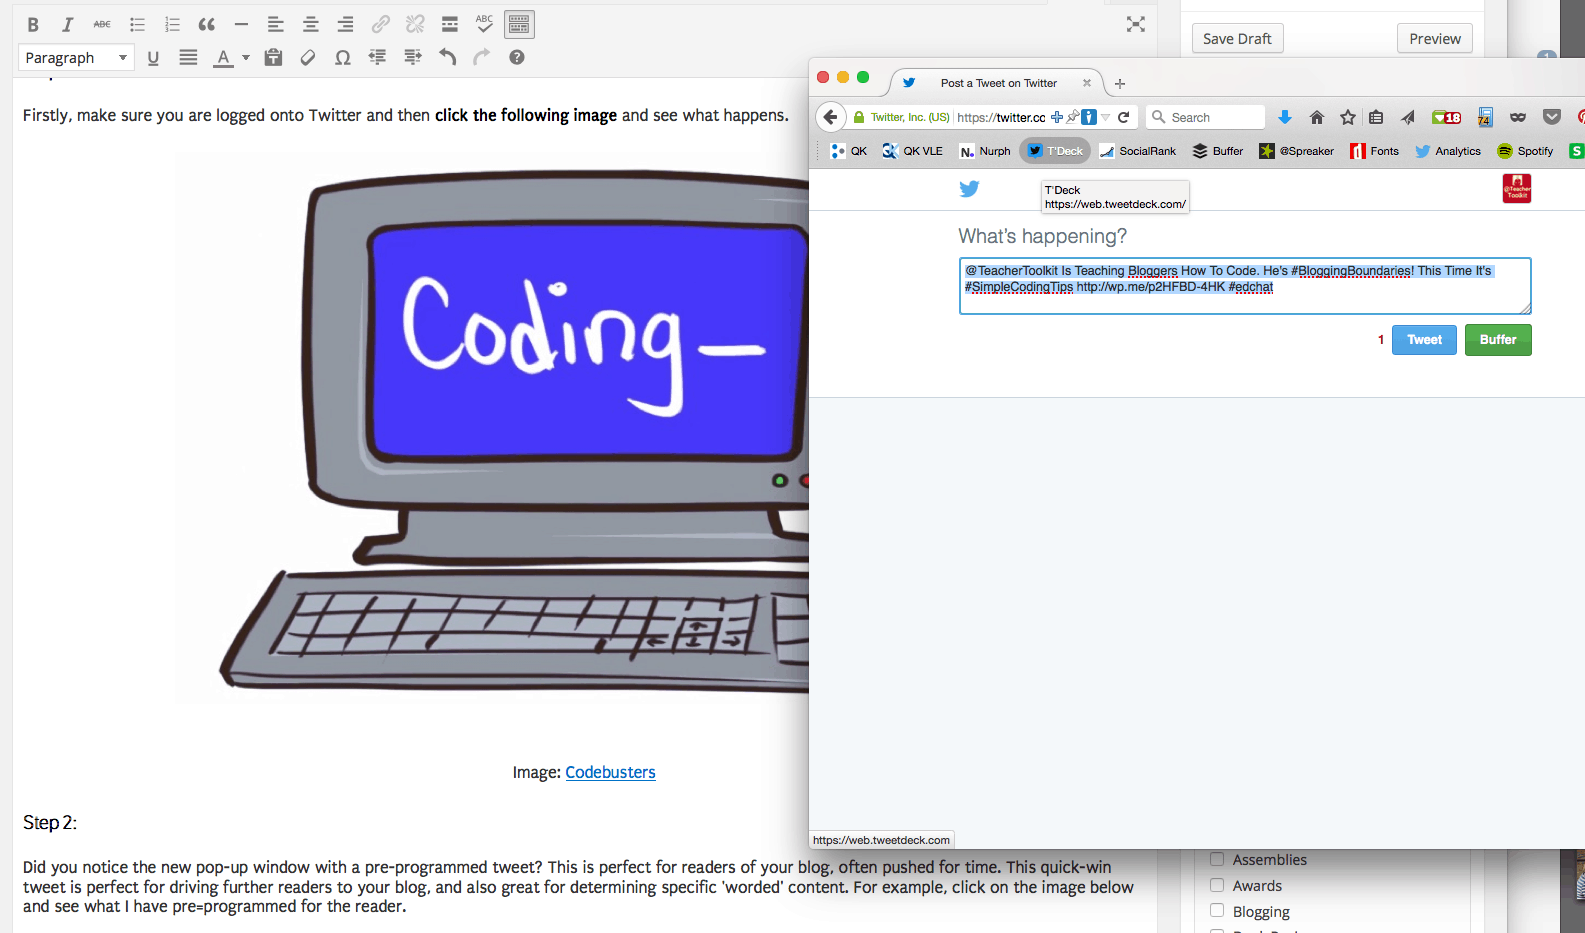
Firstly, make sure you are logged onto Twitter and then click the following image to see what happens.

Image: Codebusters
Step 2:
Did you notice the new pop-up window with a pre-programmed tweet? This is perfect technique to use with readers to your blog, who are often pushed for time to find something new or interesting to read. This quick-win tweet is perfect for driving further readers to your blog, and is an easy-fix for readers who want to share your content quickly. Here is an image of what should happen on your device/screen; look at the pop-up image on the right (click to enlarge).
Step 3:
This coding technique is also great for determining specific ‘worded’ content. For example, click on the image below and see what I have pre-programmed for the reader. As long as the content is worded within 140 characters, it is perfect for sharing on Twitter.
 Image: KeepCalm-O-Matic
The code can even be a hyperlink, such as this one, instead of the image above. Once you have the HTML Twitter coding, you can link the information to anything you want. Text, an image, a video and so on …
It’s also important to include a short hyperlink to the blogpost you want the audience to read.
Step 4:
Before we start, you will need to remember three key numerical codes and place these before any word;
- Percentage symbol 23 (or %23) = places a hashtag before the word, therefore creating an algorithm to make this searchable.
- Percentage symbol 40 (or %40) = creates an @ symbol so that you can include your own handle (or someone else) in the tweet.
- Percentage symbol 20 (or %20) = create that all important spacing between each word.
Using these codes can be tricky, and I didn’t get it correct the first time. It’s a matter of trial and error, with plenty of copy and paste codings into new browser windows to see if the coding works.
Step 5:
So, how can you learn this simple technique for yourself to drive further readers to your blog? Well, this is the full HTML code:
1.
“https://twitter.com/intent/tweet?text=%40TeacherToolkit%20Is%20Teaching%20Bloggers%20How%20To%20Code.%20He%27s%20%23BloggingBoundaries!%20This%20Time%20It%27s%20%23SimpleCodingTips%20http%3A%2F%2Fwp.me/p2HFBD-4HK%20%23edchat”
Once you master step 9 below, you can work directly within the browser address bar and alter the code there. This is how the code appears within the browser’s address bar;
2.
“https://twitter.com/intent/tweet?text=%40TeacherToolkit (Twitter handle) Is Teaching Bloggers How To Code. He’s %23BloggingBoundaries! This Time It’s %23SimpleCodingTips http%3A%2F%2Fwp.me/p2HFBD-4HK (blogpost address) %23edchat”
Do not attempt to copy the code 2 above, instead use code 1 above in your browser address bar and see how it works.
Step 6:
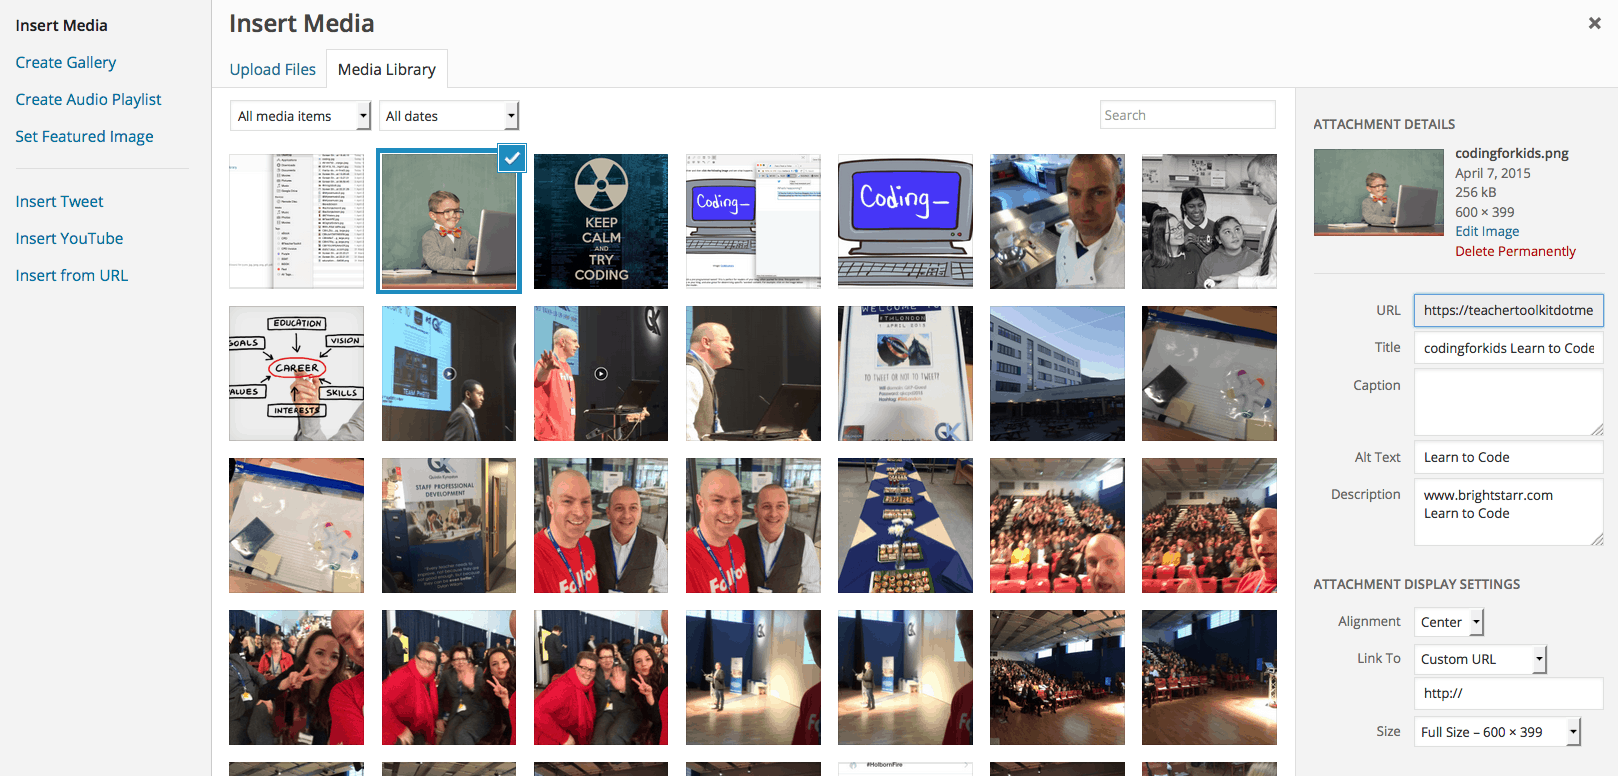
Now, you have the basic principles, it is now time to create your own code. I am using WordPress.com, so if you would like to embed an image into a blog post and use my pre-programmed coding technique to generate a wider readership, refer to this simple image below and the screenshot I’ve used from my website to show you how this can be embedded into this blogpost.
Here is the image;

Image: Brightstarr
Here are the embedded images below within WordPress.com.
This is purely to demonstrate how to add the above image into your website. Click to open each of the images.

Step 7:
So, let’s assume you now have a written blogpost and have found some relevant images (attributed of course) to link into your article. Now is the time to add the coding to each image so that you can hook the audience even further into the article, with the intention of them (hopefully) clicking on the images to auto-load your pre-programmed tweets. The result, your blog will be shared with audience further afield than your own followers.
Step 8:
Here is the image I have chosen to include within my blog. The image is relevant, engaging and a simple sentence such as; “click this image to say what you really think!” may entice the reader to actually click on the image.
Click On This Image To See What I Really Think!
Did you get hooked into the image? Clever eh?
Step 9:
Allow me to separate the coding used in the image above, to explain it very clearly to you:
- https://twitter.com/intent/tweet?text= (this is the Twitter intent coding that opens a new window on Twitter)
- I%20Fell%20For (I followed by %20 = a spacing between two words. ‘I’ and ‘Fell’ and ‘For’)
- This is then followed by %20 = spacing before a %40 which is an @ symbol.
- TeacherToolkit (my Twitter handle is then used to include me within the tweet)
- %27s (an apostrophe uses the code %27 followed by s)
- %20Coding%20Trick.%20Damn%20It!%20 (is broken into ‘Coding’ and ‘Trick’ and ‘Damn’ and ‘It!’)
- ‘He%27s’ includes a space and an apostrophe.
- Followed by a space %20 and a hashtag code %23BloggingBoundaries ( = BloggingBoundaries)
- Can you work out what this line says? 20And%20Teaching%20Me%20%23SimpleCodingTips%20
- This is the coding for my blog = http%3A%2F%2Fwp.me/p2HFBD-4HK
- With a final spacing and the word ‘Bravo!’ = %20Bravo!
Step 10:
In full, the coding I used for the final image reads in full as:
https://twitter.com/intent/tweet?text=I%20Fell%20For%20%40TeacherToolkit%27s%20Coding%20Trick.%20Damn%20It!%20He%27s%20%23BloggingBoundaries%20And%20Teaching%20Me%20%23SimpleCodingTips%20http%3A%2F%2Fwp.me/p2HFBD-4HK%20Bravo!
Try coping and pasting this into your address bar and editing the word ‘BloggingBoundaries.’ Try replacing the word with ‘JustTesting.’ Copy and paste the entire code from the address bar and then paste the code into a new window. What happens?
If it works, then you are 1/2 way there to being able to edit your own coding to embed pre-programmed tweets into your blogs.
Go on, try clicking my last image / coding below …

Disclaimer:
Please bear in mind that I once scored a grade F for Computer Studies in 1989. This was 3 years after a raving school report from my ICT teacher in 1986 (before I moved schools) and spent the final three years of my examination course, coding and playing games! However, despite the abysmal outcome, I appear to have mastered ICT in my own time well-away from examination papers.
Copyright Licence

@TeacherToolkit Ltd. by Ross Morrison McGill is licensed under a Creative Commons Attribution-NonCommercial-NoDerivs 3.0 Unported License. Based on all work published at TeacherToolkit.me

9 thoughts on “10 Simple Coding Tips for Bloggers”